How to setup the "Directory" module?
Add Entry
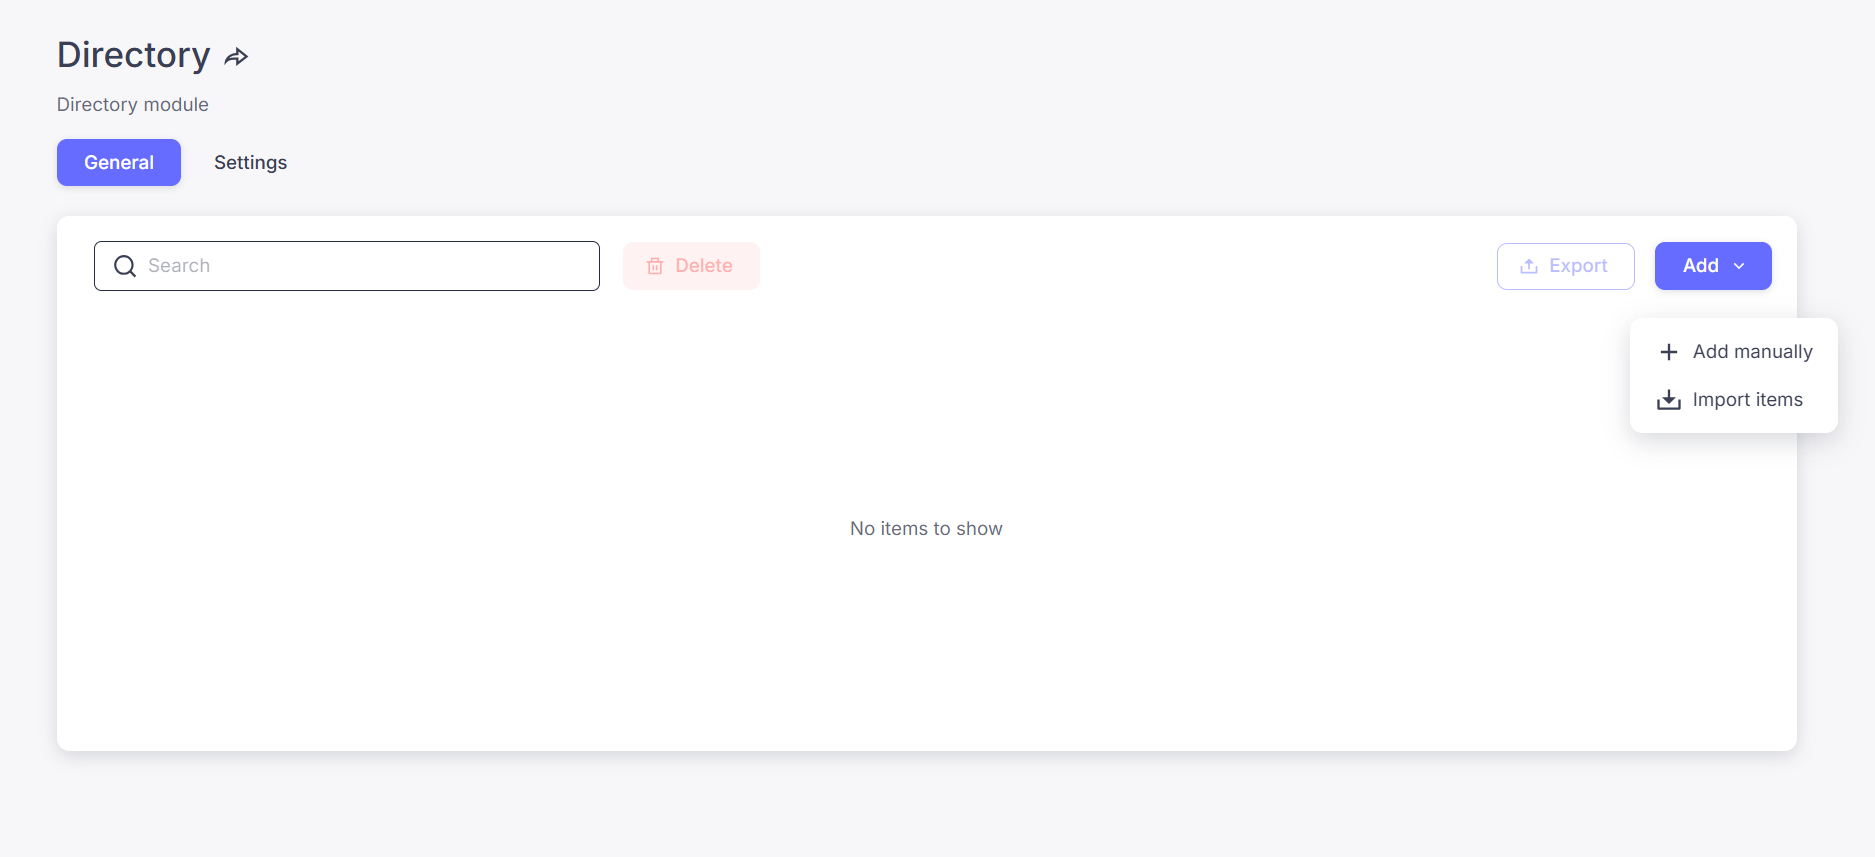
Ready to build your list? You can populate your Directory in two ways: one by one for curated entries, or all at once to save time.
- Start: Click the Add button in the top right corner of your "General" tab.
-
Add Individually 👤: Select "Add manually" to enter specific details for a single venue, sponsor, or partner. Simply fill in the fields and save.
Add in Bulk 📂: Select "Import items" to upload a large list at once.
- First, Download the CSV Template to ensure your data matches the app’s format.
- Once your file is ready, click "Import items" again to upload your completed template and launch your directory instantly.
Note:
- Data can be exported with the "Export" button and then imported in another app or "Directory" module in the same app.
- Use the "Index" column to sort the entries
- Bulk actions are made possible once you selected the entries you want to modify
- "Map View" is automatically enabled if you have entered a location for your entries
- A search bar is automatically activated in the app when there are 10 or more entries
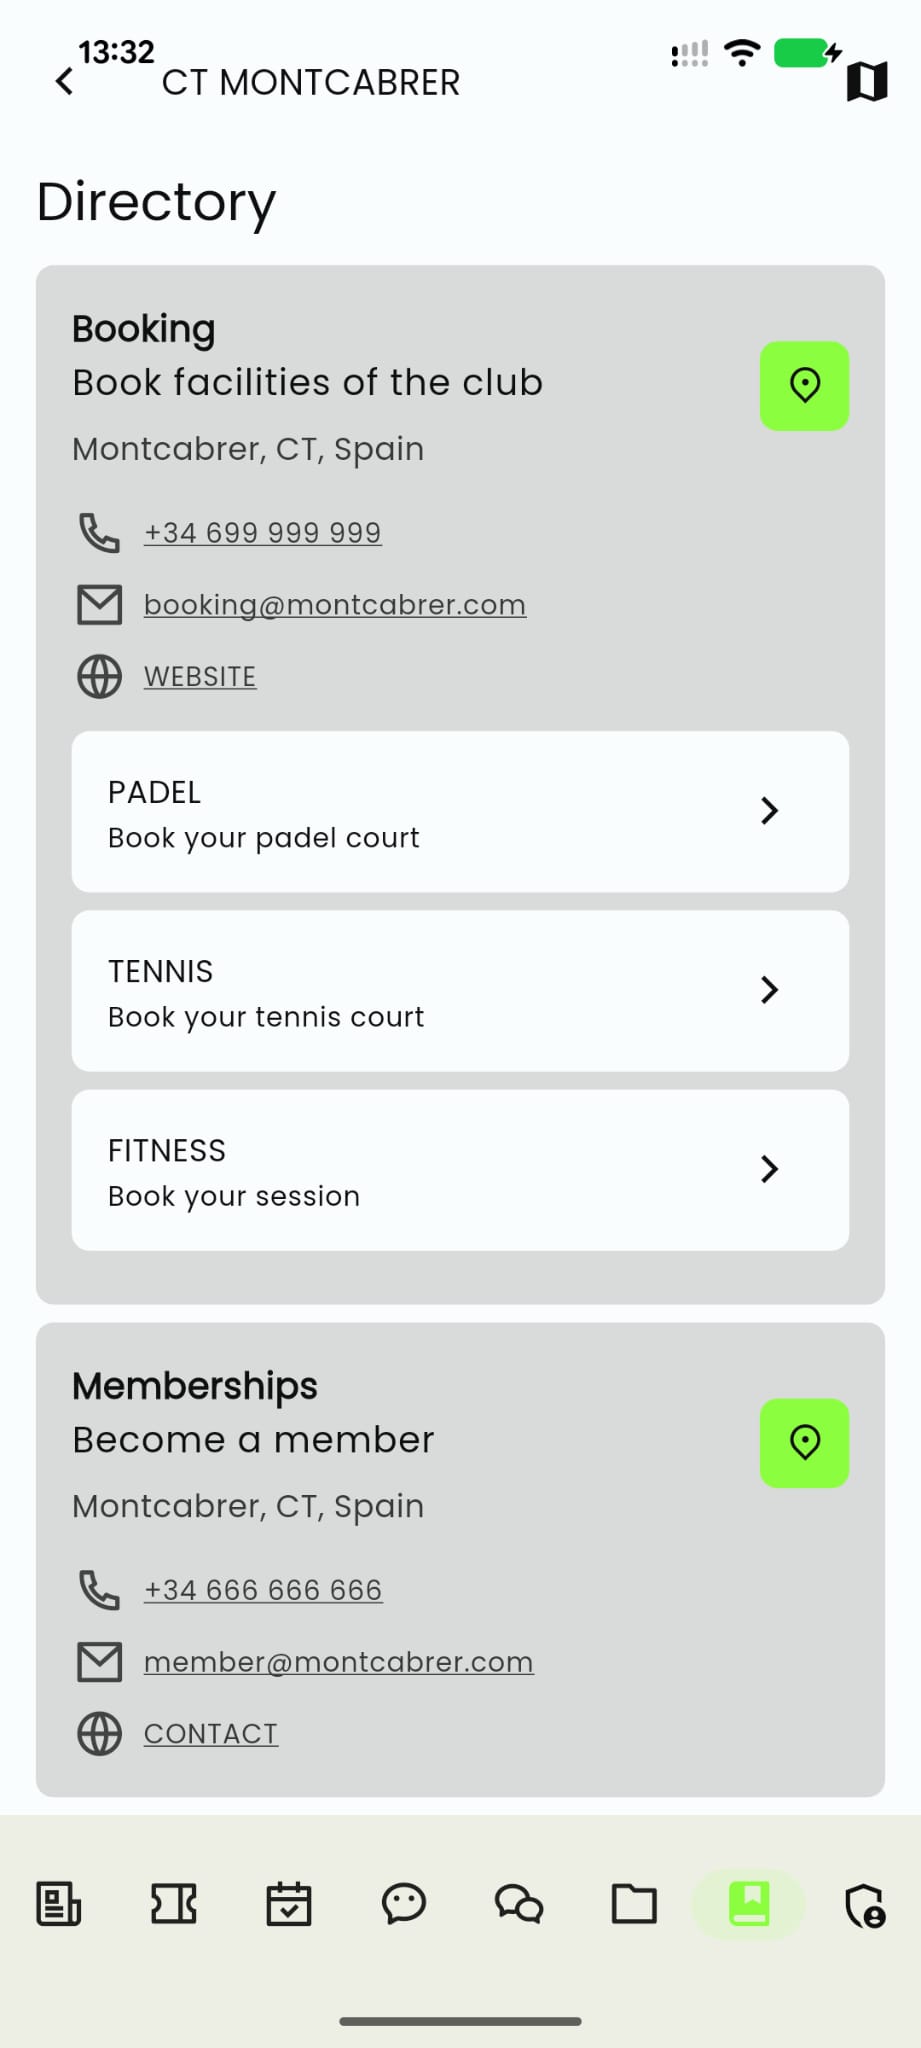
Use Sections
You can add section to an entry to add more data. Just fill in the information in the section (Title, Subtitle and Link). Sections are displayed like this in the app. The first entry (Booking has sections) the other entry (Memberships) doesn't have sections:
Customize the name and the icon of the module
- Go to Directory in the left menu.
- Click on the Settings section.
- To customize the name of the module (by default it is Directory) write the new name in the "Module name" input box.
- Customize the icon. Choose the icon that suits you best from the following icon library.

Note. Most modules can have a customized logo and name. The process is consistent accross all modules: look for the settings tab and follow the same steps as above.