How can I create and manage an event?
- First you need to add the module Events to your app. If you don't know how, please go to How to add a new module to my app?
- Go to Events in the left menu.
- Click on the add button. There is two ways of creating a event.
- You can Add manually all the info
- You can Import all the info. Go to How can I import my events?
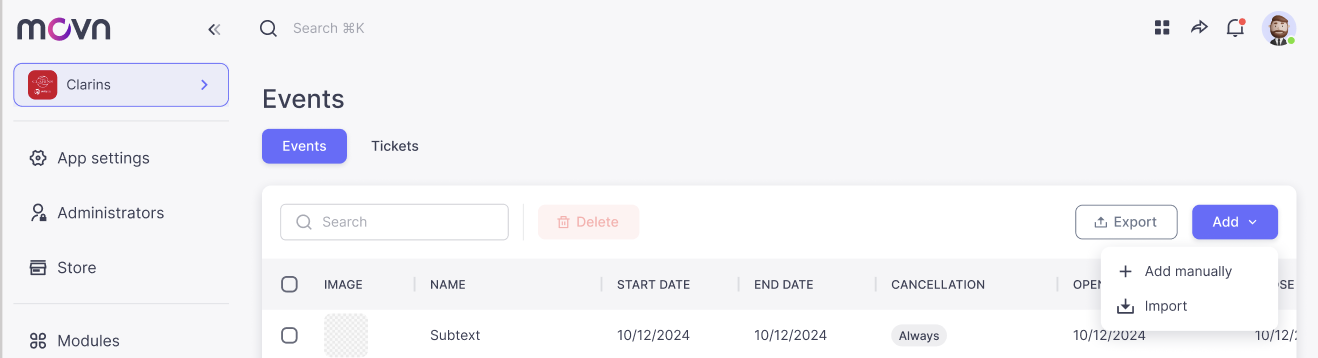
Add manually
- A new file in the table will appear with all the info we need to create a new event. To edit click on each one of the following slots:
- Image Event. Upload the image of the event.
- Name of the event. Name of the event.
- Start date. Set the date on the pop up calendar that will appear.
- End date. Set the date on the pop up calendar that will appear.
- Location. Add the location of your event. A pop up will appear, you can add the exact location with google maps.
- Price. Set the exact price of your tickets. 0 is Free.
- Currency. Choose the currency.
- Price text. This text will appear on top of the Price but the price is still used as per the previous point. Example "From 45€".
- Capacity. Set a number of tickets available for the event. Set 999999 for unlimited.
- Max. tickets. Set a maximum number of tickets per user/registration.
- Show sold. Choose whether to show or not the number of sold tickets.
- Registration opening. The date and time when event registrations open.
- Registration closing. The date and time when event registrations close.
- Cancellation. Set the deadline until which participants can cancel their registration. You can also choose the options ‘Anytime’ or ‘Never’.
- About. A detailed description of the event. Markdown is supported for headings, bold text, links, and more.
- Registration text. Add custom text to the Registration section if you want to provide important information about the registration process.
- Registration. Choose how participants register for the event. Select ‘In-app’ to handle registrations directly through the platform (required if you wish to use our integrated payment gateway), or provide an external URL to use your own registration system.
- Form-URL. Enter the URL of your external registration form. Leave this field empty if you are using in-app registration.
- Check out text. Optional text that appears after a user registers in-app. Leave this field empty if you are using external registration form.
- Private. If enabled, the event will not be visible to users. All events are private by default.
- ID. This is the internal event ID. We recommend keeping the system-generated value unchanged.
